Thursday, October 30, 2008

Tomato Soup, and the gift of food

Lunch today is: Tomato Soup! Now, I hate canned tomato soup like Campbell's. It's one of those things that I want to like, because it seems so cozy and perfect to have tomato soup and grilled cheese sandwiches for lunch on a cold day, and I've tried it, but it's just gross! I don't like ketchup, and to me it was like drinking warm ketchup. But homemade tomato soup that's easy to make and doesn't use fresh tomatoes (which are NASTY unless you get them in season locally), sounded like it might turn out to be what I have always been hoping for in Campbell's.

By the way, you see why I created this food blog?? I have some very strong opinions...

I used leftover chopped onion and red bell pepper for the vegetables in this soup; I didn't have celery and I simply forgot the carrot. I didn't have basil, but it's great without and would be good with it too, but I wouldn't buy it just for this recipe. For the optional heavy cream, I added a splash (maybe 1/4 cup) of half and half. It says to use an immersion blender but I used the regular ol' blender - if you do this remember to take off the removable piece from the blender top!! Cover the hole with a towel loosely and let the steam out. Just ask my sister what happens if you forget to to this.... Let's just say you'll be cleaning soup off the ceiling and ordering a new lid that afternoon...

Homemade Tomato Soup
recipe from Michael Chiarello on foodtv.com


1 (14-ounce) can chopped tomatoes
3/4 cup extra virgin olive oil
Salt and freshly ground black pepper
1 stalk celery, diced
1 small carrot, diced
1 yellow onion, diced
2 cloves garlic, minced
1 cup chicken broth
1 bay leaf
2 tablespoons butter
1/4 cup chopped fresh basil leaves
1/2 cup heavy cream, optional

Preheat oven to 450 degrees F.

Strain the chopped canned tomatoes, reserving the juices, and spread onto a baking sheet, season with salt and pepper, to taste, drizzle with 1/4 cup of the olive oil and roast until caramelized, about 15 minutes.

Meanwhile, in a saucepan, heat remaining olive oil over medium-low heat. Add the celery, carrot, onion and garlic, cook until softened, about 10 minutes. Add the roasted chopped canned tomatoes, reserved tomato juices, chicken broth, bay leaf and butter. Simmer until vegetables are very tender, about 15 to 20 minutes. Add basil and cream, if using. Puree with a hand held immersion blender until smooth.

OK, now to my gift! THIS was dessert last night: A frozen peanut butter pie, courtesy of my friend Pepsi! It was sooooo good and I'm about to go get a piece right now since I'm thinking about it! I told Erol about it at dinner and he could hardly wait for it, then once we got home he was kinda dancing around me asking when I was going to cut him a slice. This was my text to Pepsi while we were eating it: "Wow we both want to dive into this pie!" It was light and fluffy in texture and tasted like pure peanut butter heaven.

Wednesday, October 29, 2008

I met Ina Garten!!

Andy and I went to Ina Garten's book signing at Sur La Table in Arlington today!! We waited patiently in line for 90 minutes, outside in the cold and inside the store which was very crowded with people and merchandise. Luckily I had enough toys and snacks for the boy so he was content in his stroller the whole time. This trip could easily have been disastrous if he failed to cooperate. Here's our first glimpse of Ina! We thought we were getting close, but inside the line wrapped around the entire store, so we weren't even half way yet at this point.In the ROOM!
So, it's not exactly a picture with Ina Garten, more like we're in the same frame, but at least she's smiling.
She talked to Andy over her table, asked his name and remarked how well behaved he was. The lady in front of us agreed he was very patient (Good Boy!!). There was a pause while she was signing my books, so I go "I'm a big fan." I'm such a dork! But she did chat with me for about 10 seconds, so that was nice of her.

Here are a few recipes I plan on trying out soon:
Parmesan & Thyme Crackers
Roasted Potato Leek Soup
Coq au Vin
Dinner Spanakopitas
Chive Risotto Cakes
Orange Pecan Wild Rice
Brownie Pudding
Easy Sticky Buns
Homemade Granola Bars
French Apple Tart

Tuesday, October 28, 2008

Potato Chip Cookies

I saw recipes for Potato Chip Cookies in two different places on the same day, so I took it as a sign that I must make them. I don't have a rule or anything, but hey, it sounded good to me!

Now, I had NO idea what to expect here. I've never heard of these before, and certainly never eaten them. You'd think they'd be salty, right?? But no, they're not! I don't know why and it's really strange. They don't taste like potato chips at all, and you'd never know they're in there, except for they feel kinda potato-chippy when you chew them. The flavor is very buttery and a little nutty from the pecans. They are crisp, and extremely light and crumbly, like a pecan sandy but lighter in texture. Erol said that they are similar to chips in that you could eat a dozen of these before you realize it.
Potato Chip Cookies
recipe from The Best Of Fine Cooking Cookies magazine

8 oz. (1 cup) unsalted butter, softened at room temperature; more for shaping
1/2 cup granulated sugar; more for shaping
1 tsp. pure vanilla extract
8 oz. (scant 2 cups) all-purpose flour
2 oz. (1/2 cup) finely chopped pecans
1/2 cup finely crushed potato chips

Position oven racks in the middle and top of the oven and heat the oven to 350°F. Line two large baking sheets with parchment.
With a stand mixer (use the paddle attachment) or a hand mixer, beat the butter and sugar on medium speed in a large bowl until creamy and well blended, about 4 minutes, scraping the bowl as needed. Add the vanilla and beat again until blended. Add the flour, pecans, and potato chips and mix on low speed until just blended.
Shape heaping teaspoons of dough into 1-inch balls. Arrange the balls about 2 inches apart on the prepared baking sheets. Put some sugar in a shallow bowl. Lightly grease the bottom of a glass or measuring cup with soft butter. Dip the glass into the sugar and press the glass down on a dough ball until it’s about 1/4 inch thick. Repeat dipping and pressing with the remaining balls.
Bake until the cookies look dry on top and the edges are light golden, 10 to 12 minutes, rotating and swapping the positions of the sheets for even baking. Let the cookies cool on the sheets on racks for 5 minutes before transferring them to racks to cool completely.
Store at room temperature or freeze in an airtight container, separating the cookie layers with waxed paper.

Rosemary Butter Cookies

If my condo was burning down, I would grab the magazine this recipe is in. Once I thought I lost it, and I almost lost IT! I would have written to the Martha Stewart company begging for a replacement.

Anyway, I make these cookies every year for Thanksgiving. My mom and sister would have me disinvited if I didn't bring them! Rosemary is an unusual ingredient for cookies, I know, but if you like the scent of rosemary you will LOVE these cookies. They are incredibly good. And with the sugar on the the outside, they remind me of those tins of butter cookies, just homemade, and with a twist. I saw my baggie of rosemary from my parents' yard in the fridge and couldn't think of anything else to make but these.

When you roll the logs of dough, make them quite skinny so you will have cute small cookies. I use Turbinado sugar (or Sugar in the Raw) instead of sanding sugar since it's much cheaper and very good. Rosemary Butter Cookies
recipe from Martha Stewart Holiday Cookies magazine, 2006

Makes about 5 dozen

1 cup (2 sticks) unsalted butter, softened
3/4 cup granulated sugar
1 large egg plus 1 egg white, beaten
1 teaspoon pure vanilla extract
2 1/2 cups sifted all-purpose flour
1 tablespoon finely chopped fresh rosemary
3/4 teaspoon coarse salt
1/2 cup fine sanding sugar


Put butter and granulated sugar in the bowl of an electric mixer fitted with the paddle attachment; mix on medium speed until pale and fluffy, about 2 minutes. Mix in whole egg and vanilla. Reduce speed to low. Add flour, rosemary, and salt, and mix until combined.
Halve dough; shape each half into a log. Place each log on a 12-by-16-inch sheet of parchment. Roll in parchment to 1 1/2 inches in diameter, pressing a ruler along edge of parchment at each turn to narrow log. Transfer to paper-towel tubes to hold shape, and freeze until firm, about 1 hour.

Preheat oven to 375. Brush each log with egg white; roll in sanding sugar. Cut into 1/4-inch-thick rounds. Space 1 inch apart on baking sheets lined with parchment. Bake until edges are golden, 18 to 20 minutes. Let cool on sheets on wire racks. Store in airtight containers at room temperature up to 3 days.

Chocolate Chunk Cookies

It has been cookie mania over here in my messy kitchen! I've made Potato Chip Cookies, Rosemary Butter Cookies, and these Chocolate Chunk ones. Of course, each one comes with it's own story, so here they are, one at a time.

We call these Mac Cookies because my grandmother, who we called Mac, made these by the thousand every time she visited us from Florida. They are by far the best thing she ever did for us kids, but hey, we'll take what we can get! The recipe is originally from the packaging of Baker's Semi-Sweet Chocolate, though they have changed the recipe since. I didn't add walnuts today, but I usually do (black walnuts when I can get my hands on them), or sometimes pecans. I get my chocolate from Trader Joes, and I use bittersweet, which is less sweet than semi-sweet. You can use either light or dark brown sugar, but I prefer dark. Especially if you add nuts, the batter seems extremely chunky, like there's not enough batter for the chunks of chocolate and nuts, but don't be alarmed! You can make small, bite sized cookies or huge ones and they will all be perfect, just adjust the cooking time a minute or so more or less.Chocolate Chunk Cookies
1-3/4 cups flour
3/4 tsp. baking soda
1/4 tsp. salt
3/4 cup (1-1/2 sticks) butter or margarine, softened
1/2 cup granulated sugar
1/2 cup firmly packed brown sugar
1 egg
1 tsp. vanilla
1 pkg. (12 oz.) BAKER'S Semi-Sweet Chocolate Chunks
1 cup chopped toasted walnuts

HEAT oven to 375°F.

MIX flour, baking soda and salt in medium bowl; set aside.

BEAT butter and sugars in large bowl with electric mixer on medium speed until light and fluffy. Add egg and vanilla; beat well. Gradually beat in flour mixture. Stir in chocolate chunks and walnuts. Drop by heaping tablespoonfuls on to ungreased cookie sheets.

BAKE 12 to 13 minutes or just until golden brown. Cool on cookie sheets 1 minutes. Remove to wire racks and cool completely.

Monday, October 27, 2008

Brie en Croute

Here is another recipe from our weekend at Deep Creek Lake. I placed the brie in a round glass oven-safe dish, rather than on a cookie sheet as called for, for easy transport in the cooler. It baked up perfectly in the dish, but I'm sorry I didn't take a picture of the final product. I did paste at the bottom a picture from Foodtv.com where the recipe is listed.

This is one of those SIMPLE recipes that never fails to wow people. A 2 year old could make this. What makes this special is 1) it looks cool, 2) frozen puff pastry is such a great product and everyone is automatically impressed because it's not an everyday ingredient, and 3) Brie cheese is so delicious and special just on it's own. I'd make this much more often if Brie was less expensive, but the fact that it's a once-in-a-while dish also makes it special.Brie en Croute
recipe from The Lady & Sons Savannah Country Cookbook by Paula Deen
1 sheet frozen puff pastry, pre-packaged
1 tablespoon unsalted butter
1/2 cup walnuts
1/8 teaspoon ground cinnamon
1 (8-ounce) wheel Brie
1/4 cup brown sugar
1 egg, beaten
Crackers, for serving
Preheat oven to 375 degrees F. Defrost puff pastry for approximately 15 to 20 minutes and unfold.
In a saucepan, melt the butter over medium heat. Saute the walnuts in the butter until golden brown, approximately 5 minutes. Add the cinnamon and stir until walnuts are coated well. Place the walnut mixture on top of the Brie and sprinkle the brown sugar over the mixture.
Lay the puff pastry out on a flat surface. Place the brie in the center of the pastry. Gather up the edges of the brie, pressing around the brie and gather at the top. Gently squeeze together the excess dough and tie together with a piece of kitchen twine (or just overlap the corners of the dough on top).
Brush the beaten egg over top and side of Brie. Place Brie on a cookie sheet and bake for 20 minutes until pastry is golden brown. Serve with crackers. To give a special look, cut extra pastry into heart or flower shapes and bake until golden.
Picture is from foodtv.com

Pumpkin's second life

This good little pumpkin made a great cheesecake, and now proudly adorns our front door :o)

Saturday, October 18, 2008

Pumpkin Cheesecake!

Yes this post deserves an exclamation point! It is yummmmmmmmmmmm delish!
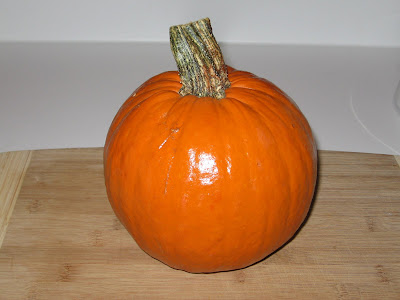
Special thanks to Lestra for giving me this awesome baking pumpkin, and to Pepsi for giving me the idea for pumpkin cheesecake! I googled the recipe from California Pizza Kitchen, where Pepsi says she and her husband look forward to their pumpkin cheesecake every fall and hope they haven't run out by the time they get there!

Who knows how authentic this recipe is to CPK since it's from some random website, but either way it gets two thumbs up from me. I'll post the recipe as is first, then share my notes and pictures:

California Pizza Kitchen Pumpkin Cheesecake
recipe from
fooddownunder.com

GRAHAM CRACKER CRUST
1 1/2 cup graham cracker crumbs (about 22 sheets, finely crushed with a rolling pin)
3 tbl sugar
6 tbl unsalted butter melted

CHEESECAKE FILLING
3 pkt cream cheese - (8 oz ea)
1 1/2 cup dark brown sugar - (firmly packed)
1 tbl all-purpose flour plus
2 tsp all-purpose flour
1 1/2 tsp ground cinnamon
1/8 tsp ground cardamom
1/8 tsp ground cloves
1/8 tsp ground ginger
1/8 tsp grated nutmeg
1 cup sour cream plus
2 tbl sour cream
3 lrg eggs
2 tsp vanilla extract
1 1/4 cup canned pumpkin puree

To Make the Graham Cracker Crust: Put the graham cracker crumbs in a food processor fitted with the steel blade and process until they have a uniformly fine texture. Add the sugar and pulse to combine. With the machine running, pour the melted butter through the feed tube and continue processing just until the mixture forms a soft mass. Remove from the processor and firmly press the mixture into the base of a 9-inch springform pan, spreading it evenly.

To Make the Cheesecake: Preheat the oven to 350 degrees.

In the bowl of an electric mixer fitted with the flat beater attachment, beat the cream cheese until soft, stopping the mixer occasionally to scrape down the sides and bottom of the bowl with a rubber spatula. Add the brown sugar and continue beating until thoroughly incorporated and creamy.

In a separate small bowl, stir together the flour, cinnamon, cardamom, cloves, ginger, and nutmeg. Add the flour mixture to the cream cheese mixture and beat until thoroughly combined, stopping occasionally to scrape down the bowl. In the same way, beat in the sour cream and then, one at a time, the eggs, scraping down the bowl after each addition. Add the vanilla and pumpkin and beat until thoroughly combined.

Pour the filling into the prepared springform pan and place on the center rack of the oven. Bake for 1 hour. Protecting your hands with oven mitts or pads, test for doneness by gently moving the pan to see if the center of the cheesecake has firmed up - a sign of doneness - or is still slightly fluid (alternatively, check the cheesecake's internal temperature with an instant-read thermometer, which should register 180 degrees). The cheesecake may require up to 20 minutes more baking time.

When it is done, let it cool to room temperature and then refrigerate it overnight before removing the side of the pan. Cut the cheesecake into wedges with a sharp knife.


OK first, cardamom. CARDAMOM! This spice, of which only 1/8 teaspoon is called for in this recipe, is $15 per jar! Even $13 on sale at Safeway was RIDICULOUS. I should have noted in my apple butter post that I did not include the cardamom, so I apologize but I'm pretty certain that you'd leave it out too. Cardamom is related to the ginger family, but with all the spices going on (in both recipes) I did not add more of ginger or anything else, I simply omitted it and recommend you do the same if you want to save a little money. Or instead use the $14 (sale price) for four pounds of unsalted butter like I did! Goodness groceries are expensive!

But while we're on the subject of spices, I can't talk about spices and not talk about Penzeys. Penzeys is a spice retailer that I absolutely love. My momma learned about them and started ordering boxes and boxes of spices for me, my sister, and herself every Christmas. They are very high quality and much cheaper than grocery store prices for McCormick or store brand spices. And the selection is infinite for all types of whole and ground spices and spice blends. For example check out the cardamom page! See, I could spend $4 and get four tablespoons (1/4 cup jar) of cardamom seeds or ground. They opened a store in Carytown, near my folks house, and they also have one in Falls Church. You can smell each and every single spice they carry at their stores and it's magnificent. I could die in that place. I love it so much. But really though, your nose does wear out after a dozen or so, so sniff selectively.

The recipe of course calls for pumpkin puree, canned, but since I had that lovely pumpkin... well, it met an early demise... 
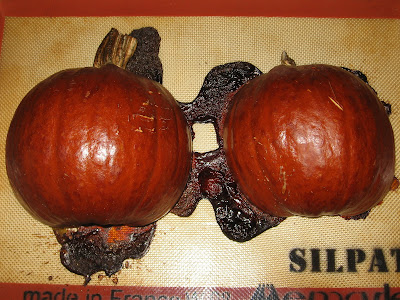
(isn't this cooler than a jack-o-lantern!!)

Please, don't feel sorry for the pumpkin, it was happy to live out it's full potential as a cheesecake. Feel sorry for my poor knife because a hammer was involved with getting the sucker split open.
Martha says to roast a pumpkin, cut it in half and remove the seeds, then place cut side down on a baking sheet in a 400 degree oven for at least 1 hour. Mine roasted as such for about 15 minutes, then I had to leave the house, so I turned off the oven without opening the door, and let them sit in there while I was gone for 2 hours.
They were perfectly soft and steaming hot under very hard shells when I got home!
I took the pumpkin flesh and whirred it up in the food processor once it was cool, and I had a little less than 2 cups of fresh pumpkin puree. It tasted really good just plain!

Here's the graham cracker crust I was pressing into the pan with a cup. I thought the crust came out too thick, so next time I'll use less graham crackers, but it tasted good and held the shape of the cheesecake nicely.
Here's the pumpin puree getting plopped into the batter.
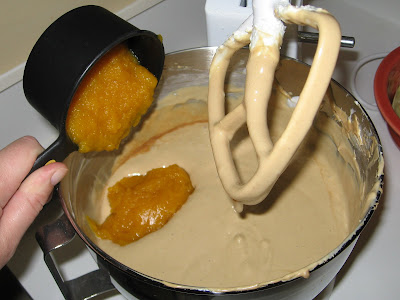
Yes, you know I sieved the batter! Do not skip this step even if it looks fine to the naked eye! You guarantee to eliminate any egg boogers and clumps of cream cheese, and your batter will be absolutely perfect and smooth. Don't forget to use separate spatulas pre- and post-sieving!
Here's the cheesecake straight out of the oven, puffed and cracked in all it's glory.
And here it is at serving time, sunken in and chilled out.
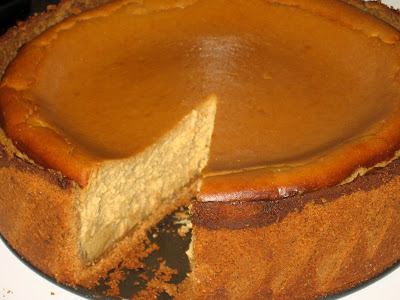
Well, I had to test it before I could get the camera, and you can't blame me for that! It is excellent - not overly spiced, not too pumpkin-y, and not to little either.
Pepsi I hope you and Kyle are home because I'm about to text you and see if you want me to drop some off at your house! No matter how much you like cheesecake you can only eat so much, so there's plenty to share! Anyone else in the area want some in fact? Let me know!

Wednesday, October 15, 2008

PB&J Bars

This is another recipe from our cabin weekend. I caught people eating this at all hours of the day and night! It's very rich and heavy, so a serving is just a small square and a glass of cold milk is a MUST!

The only tip I have for this one is don't spread the jelly all the way out to the edges of the pan. When it touches the edge, it gets too sticky and candy-like, and I like the end and corner pieces nice and crumbly.

I don't have a picture of mine, but this is from the recipe book. Better than nuthin??
Peanut Butter & Jelly Bars
recipe from Ina Garten's cookbook Barefoot Contessa at Home

1/2 pound (2 sticks) unsalted butter, at room temperature
1 1/2 cups sugar
1 teaspoon pure vanilla extract
2 extra-large eggs, at room temperature
2 cups (18 ounces) creamy peanut butter (recommended: Skippy)
3 cups all-purpose flour
1 teaspoon baking powder
1 1/2 teaspoons kosher salt
1 1/2 cups (18 ounces) raspberry jam or other jam (I used seedless strawberry preserves)
2/3 cups salted peanuts, coarsely chopped

Preheat the oven to 350 degrees F.

Grease a 9 by 13 by 2-inch cake pan. Line it with parchment paper, then grease and flour the pan.

In the bowl of an electric mixer fitted with the paddle attachment, cream the butter and sugar on medium speed until light yellow, about 2 minutes. With the mixer on low speed, add the vanilla, eggs, and peanut butter and mix until all ingredients are combined.

In a small bowl, sift together the flour, baking powder, and salt. With the mixer on low speed, slowly add the flour mixture to the peanut butter mixture. Mix just until combined.

Spread 2/3 of the dough into the prepared cake pan and spread over the bottom with a knife or offset spatula. Spread the jam evenly over the dough. Drop small globs of the remaining dough evenly over the jam. Don't worry if all the jam isn't covered; it will spread in the oven. Sprinkle with chopped peanuts and bake for 45 minutes, until golden brown. Cool and cut into squares.

Tuesday, October 14, 2008

Apple Butter Hand Pies

I would not put this recipe in the Easy category, but I still recommend you try it! This is like a pastry or turnover, a cookie-like crust with an apple butter filling. I made two batches of these, and the first was a little tricky, but I got a feeling for how the dough behaves so the second batch was much easier. Here's what I learned to share with you so it will be easier on your first go round! You really have to work quickly with this soft dough when rolling and filling it because it rapidly becomes too pliable when the fat warms up. For this reason, also be sure to turn off any above the counter lights because they may work against you. I had this problem the first time, so I just stopped mid-rolling and threw it in the fridge for a few more minutes. When I got it out again I was prepared to work much faster and without the bright lights. Also, I doubled the recipe but only used half the lemon zest called for, and still found the lemony scent and flavor to be almost too much, so in the recipe retyped here I took the liberty of halving the amount. For the first batch, which I made at my mom's house, I had a 4 1/2 inch round cookie cutter available but preferred to use one a bit smaller, and I used about the same smaller size for the second batch too (I used the rim of a large cup actually). Each batch made 22 hand pies. Last tip: do not worry if/when (really, when) the dough cracks and stretches open while folding them over; the filling will not run out, bubble over, crack much further, or burn. It will be completely fine.

Apple Butter Hand Pies
Recipe from Martha Stewart's Baking Handbook
Makes 14
(recipe easily doubled)

8 tablespoons (1 stick) unsalted butter, at room temperature
1 1/4 cups sugar
1 large egg
3 ounces cream cheese, room temperature
2 tablespoons buttermilk
1 teaspoon pure vanilla extract
3 cups all-purpose flour, plus more for dusting
1/4 teaspoon baking soda
1 teaspoon baking powder
Grated zest of 1/2 a lemon
1/2 teaspoon salt
2 cups Apple Butter
1/4 teaspoon ground cinnamon

In the bowl of an electric mixer fitted with a paddle attachment, combine butter and 1 cup sugar. Beat on medium speed until light and fluffy, about 5 minutes. Add egg to the sugar-butter mixture, and beat until just blended.


Add cream cheese, buttermilk, and vanilla extract, and beat until well combined. Combine flour, baking soda, baking powder, lemon zest, and salt, and add to the cream-cheese mixture. Beat until completely blended. Transfer the dough to a piece of plastic wrap, and using your hands, press the dough into a 1-inch-thick patty, wrap well, and refrigerate for at least one hour. If preparing ahead of time, the dough can be stored at this point for up to one month in the freezer.

Divide the refrigerated dough in half. On a lightly floured work surface, roll out one half of the dough to 1/8-inch thickness. Using a 4 1/2-inch-round biscuit cutter, cut seven circles out of the rolled dough. Transfer the circles to a parchment-lined baking sheet, and place in the refrigerator to chill for about 30 minutes. Repeat the rolling, cutting, and chilling process with the remaining half of dough.

Remove the chilled dough from the refrigerator, and let stand at room temperature until just pliable, 2 to 3 minutes. Spoon about 2 tablespoons apple butter onto one half of each circle of dough. Using your fingers or the back of a spoon, spread out apple butter. Keep apple butter on half the circle, and spread until it is about 1/2 inch from the edge, making sure apple butter is not completely flattened. Quickly brush a little cold water around the circumference of the dough, and fold it in half so the other side comes down over the apple butter, creating a semicircle. Seal the hand pie, and make a decorative edge by pressing the edges of the dough together with the back of a fork. Repeat process with remaining dough. Place the hand pies on a parchment-lined baking sheet, and return to the refrigerator to chill for another 30 minutes.

Heat oven to 375 degrees. Combine the remaining 1/4 cup of sugar and the cinnamon in a small mixing bowl. Remove the chilled hand pies from the refrigerator, and lightly brush with cold water. Sprinkle the cinnamon sugar generously over the pies, and place pies in the oven to bake. Bake until the hand pies are golden brown and just slightly cracked, about 20 minutes. Remove the pies from the oven, and let stand to cool slightly before serving. Serve warm or at room temperature.

I think the one on the upper right must have just fallen off the cooling rack.......

Apple Butter

If you want your home to smell absolutely delicious for an entire day (or two!), make some apple butter this fall! I love making recipes like this. It's one of those that people remember their parents or grandparents making when they were young, sometimes in huge cast iron pots in the back yard. Other people say "you can MAKE apple butter??"

Slather it on toast, swirl it into oatmeal, make a little sandwich with cream cheese and apple butter, put it on pancakes or biscuits, or make Apple Butter Hand Pies - recipe coming up next!

Note: when sharing apple butter with your friends who have small babies, and you pack it in baby food containers, please do them a favor and label the containers!! Sorry for the tummy ache Emmy :o(

Apple Butter
Recipe from Martha Stewart's Baking Handbook
Makes about 2 cups

6 1/2 lbs apples (I used McIntosh and Granny Smith), peeled, cored, and quartered
1 cup sugar
2 T. apple brandy
1 cup apple cider

2 T. lemon juice
1/2 t. ground cardamom
1/4 t. ground mace
1 large cinnamon stick

1 pinch ground cloves
1/2 t. nutmeg

1 t. ground ginger

Combine all of the ingredients in a large, heavy-bottomed saucepan. Place mixture over medium-high heat, and simmer, covered, stirring often with a large wooden spoon to prevent scorching, until the apples are broken down and saucy, about an hour.


Now, either:
A) Reduce heat to medium and continue to cook for at least 2 1/2 more hours, stirring often until very thick and dark.
OR:
B) Heat oven to 200 degrees. Uncover pot, transfer to oven, and cook overnight until very thick and dark.

Let stand to cool. Store in an airtight container for up to one month in the refrigerator or up to 6 months in the freezer.

This pot started out filled to the brim with apples!

Monday, October 13, 2008

Spinach Dip Olé

I don't have a picture of this recipe, but I do have a picture of the man who requests it every time I see him! Here he is with Erol at the cabin that weekend, enjoying their favorite pasttimes of laughing and eating:

I got this recipe from Anna, my friend and former co-worker, and I've also seen it other places so I don't know where it originated. Anna had a good point when she mentioned that this recipe is so simple because it uses whole packages of only four ingredients, so it's a cinch to shop for and no leftovers of ingredients. You'll rarely have leftovers of the dip too because it's so good! Serve it with sturdy crackers like melba toasts or sliced baguette, toasted or not. You could add 1 tablespoon of red wine vinegar and salt and pepper to taste, but I thing these are unnecessary because of the salsa.

Spinach Dip Olé
one 10oz package frozen chopped spinach, thawed and squeezed dry
one 16oz jar salsa
one 8oz package cream cheese, cubed (more like pinched off into the bowl)
2 cups grated Monterey Jack cheese

Combine all ingredients and pour into a shallow baking dish. Bake at 400 degrees for aprox 35 minutes until bubbly and top is brown. Serve with bread, crackers, or chips.

Cracker Bits

These are a yummy snack for anytime! My grandma has a similar recipe using oyster crackers, and my sister has also done a similar thing with broken pieces of large hard pretzels. Everyone always loves this kind of snack!
Cracker Bits
recipe from Paula Deen

2 (10 1/2-ounce) boxes cheese crackers (recommended: Ritz Cheese Bits, not peanut butter flavor)
1/2 cup vegetable oil
1 (1-ounce) package salad dressing mix (recommended: Hidden Valley Original Ranch)
1 heaping tablespoon dried dill
1 teaspoon garlic powder
1 teaspoon celery salt

Place the crackers in a large sealable freezer container. In a bowl, mix the oil, salad dressing mix, dill, garlic powder, and celery salt. Pour this mixture over the crackers, cover the container, and invert it to coat the crackers with seasoning. Refrigerate for at least 24 hours, turning the container every so often to keep the crackers coated. Let the mixture come to room temperature before serving. Store in the covered container in refrigerator.

Thursday, October 9, 2008

Classic Pot Roast

From the "All-Purpose Cookbook": Joy of Cooking! I love this cookbook. I googled this recipe so I might copy and paste the recipe (I cheat, I know), and didn't find it, but found a really cool blog that seems kinda similar to mine (as in lots of crazy pictures of each step): The Joy of the Joy of Cooking. Definitely gonna have to check that one out more later, I only glanced through.

So this recipe is for your basic pot roast, nothing extraordinary but very delicious and exactly what you want pot roast to be. You never know where inspiration is going to come from, and I got the idea to make this for dinner from the show Desperate Housewives last week; there were several references to pot roast and it sounded good to me!

Beef Pot Roast
from Joy of Cooking


3 to 4 lb chuck, shoulder, top or bottom round, brisket, blade or rump
Flour
2 T. vegetable oil
1 carrot
1 rib celery
1/4 cup chopped green pepper
1 small onion
2 cups vegetable stock or part stock and part dry red wine
1 bay leaf

Heat the vegetable oil in a large, heavy stockpot. Dredge the meat in flour and brown on all sides. Roughly chop the carrot, celery, green pepper and onion, and add to the pot when the meat is about halfway browned. When the meat is browned, spoon off excess fat and add the stock (or stock and wine) and bay leaf. Cover and bake 3-4 hours in a 300-325 degree oven, or simmer on the stove. During this time, turn the meat several times and, if necessary, add hot vegetable stock and salt and/or pepper.

I made this one day to have for dinner the next - I let the big pot cool a bit after cooking and then just stuck it in the fridge, and the next day I took out the meat and cut a few slices, just what we'd eat that night. I put the slices in a small saucepan with some juice from the large pot and heated it up on the stove.

I served it with little potatoes that I cut and roasted with olive oil, salt, pepper, lemon zest and rosemary. Usually I think of potatoes as something that takes a long time to cook, but I cut them small and under the broiler they took just a few minutes. Just enough time to heat up the pot roast.

I added a new tag called "DINNER" and will go back and add that to the appropriate recipes to make searching for dinner ideas easier on this blog.

Monday, October 6, 2008

Chocolate Cream Pie

One day at home I decided I'd like to make a simple chocolate pie, so I searched the net for a recipe that used ingredients I already had. I got frustrated quickly, even though I have a pantry stocked for baking. But this recipe I can make anytime, with the exception of the Oreo Crust because we don't usually have those on hand. A regular pie crust is perfectly fine; the Oreo Crust just puts it over the top. Everyone's pantry is different, but I think it's more likely that someone will have a can of sweetened condensed milk on hand than a quart of heavy cream. Since I made this pie a couple of different ways, I can offer some optional ingredients because I know it will work either way, and I want to keep it simple and try to avoid trips to the store.

I used my sieve, or mesh strainer, twice in this recipe: once for the egg yolks before they were added to anything, and then again for the entire mixture before it goes into the crust. I ALWAYS sieve eggs before adding them to any cream or custard pie, like pumpkin, coconut, etc. I absolutely hate those little globby bits in the egg and find it necessary without a doubt to remove them. Have you ever noticed one in a forkfull of pumpkin pie? They don't just melt away! Yuck! Secondly, when making a custard on the stovetop, you always run the chance of curdling the eggs, resulting in little globs of cooked egg inside the mixture. Sieving after cooking ensures a super smooth and creamy pie every time. Call me anal, but I promise I'll never make you eat the glob!


Chocolate Cream Pie with Oreo Crust
recipe adapted from recipezaar.com

1 2/3 cups water
3 tablespoons cornstarch
5 tablespoons Dutch process cocoa (I only tested with Dutch, but will work with regular cocoa powder)

2 ounces bittersweet chocolate, chopped (optional, but this adds richness)
1 (14 ounce) sweetened condensed milk
3 egg yolks
2 tablespoons butter
1 teaspoon vanilla

1/2 teaspoon instant espresso powder (optional, and won't make the pie taste like coffee, only gives it a richer flavor overall)
1 (9 inch) Oreo pie crust

Put the 3 egg yolks in a sieve and press through into a small bowl. In a medium saucepan, whisk the cornstarch and cocoa with the water until smooth. Sir in sweetened condensed milk, egg yolks, and chopped bittersweet chocolate, and cook on medium until chocolate is completely melted and the mixture becomes quite thick, stirring constantly. Stir in 2 tablespoons butter, vanilla, and instant espresso powder. Press through a clean sieve into the baked and cooled pie shell, and chill in the refrigerator for 3 hours. Serve with whipped cream.


Oreo Pie Crust
recipe adapted from epicurious.com

21 Oreos (about a row and a half)
1/2 stick unsalted butter, cut into pieces, room temperature

Preheat oven to 350°F. Butter 9-inch-diameter pie dish. Finely grind cookies in a food processor. Add butter and process until mixture is evenly moistened. Press crumb mixture onto bottom and up sides of prepared pan to form thin crust. Bake crust 5 minutes. Transfer crust to rack and cool completely. Can be made ahead of time and refrigerated.

It was a Messy Kitchen weekend!

I am so backed up on this blog!! There is always a lot of cooking going on around here!

But let me just tell you about our awesome weekend - we went with 6 of our friends to a cabin at Deep Creek Lake and had the best time, and of course, had a lot of good food. A highlight for Erol was seeing his old kegerator again, which the Nelsons and Garcias brought with them! Eric had it filled with Sierra Nevada Anniversary Ale. We ate meatball subs, Marcelo's grilled chicken thighs (sorry, I cannot spill his secret recipe), bacon and eggs for breakfast, real s'mores around the campfire, etc. These were my contributions, and I will be posting the recipes although unfortunately I do not have pictures for most of them:

Spinach Dip Ole
Onion Dip
Chocolate Pie with Oreo Crust
Monkey Bread (aka Bubble Bread)
Peanut Butter & Jelly Bars
Brie en Croute