Showing posts with label dessert. Show all posts

Wednesday, August 26, 2009

Lemon Meringue Pie

This pie was not easy to make, and once I finished it I said that I probably wouldn't be making it again...


Then I had a bite.

But really how annoying is it to make a three component, gazillion-step recipe, with instructions to "Serve that day" (after cooling to room temperature). I did it though, and my friends and I were verrrrrrrry happy to dive into it the night I made it and find the lemon filling just the slightest bit warm, indicating how fresh it was. I had literally started making the thing early in the morning and my friends came over at like 8pm! And really, the pie the next day, having been refrigerated overnight, was great too, but it did bead up on top of the meringue. However, the filling and meringue did not separate or get oozy, and the flavor didn't dull, so I might make this one day ahead of time if I needed to. Well... at least I might do the crust ahead because that took hours of chilling in between steps, but I'd do the filling and meringue the same day - these components cannot be made separately ahead of time.

The recipe is from the ol' tried and true American Classics cookbook from Cooks Illustrated (and America's Test Kitchen). It's in fact the dish pictured on the cover, so I see it allllllllllll the time and was finally compelled to make it.

The recipe seriously is long and tedious (and I'd have to re-type it since it's not online), so I won't post it unless there is a request for it. I'm happy to do it though if anyone wants it, so just ask!

An interesting part of this pie is the crust, which is rolled out with graham cracker crumbs rather than extra flour. This makes the crust a little... heartier I guess is the right word. It does not get soggy next to custard fillings.
For this kind of pie, and many others, you have to bake the pie crust before putting in the filling. Pie crust is tricky, I don't care what anyone tells you. You make the dough, chill it, think it's lookin' good. You roll it out, still doing OK. Get it in the dish, crimp the edges with a fork or somehow manage to make the edges look decent - homemade looking, but decent. You're feeling good. You might even chill it for a while at this point, but then you throw it in the oven and it SHRINKS majorly and it BUBBLES up in the middle like a sopapilla. It can ruin your day.

I liked this pie crust recipe (which can be rolled graham cracker crumbs or flour depending on the type of filling), even though I had previously sworn by Martha's pate brise (an all butter dough). This one has butter and shortening. You can see from the before baking and after pics that it only shrank a little, and did not bubble up. Oh happy day!

Two main steps made this possible: 1: proper chillage (once it's in the pie dish, refrigerate 40 minutes and then freeze 20 minutes just before baking), and 2: pie weights (I have ceramic ones, but the link I made to heavier, metal ones on a chain is the kind I want for Christmas, hint hint anyone!). Some cookbooks will tell you that dry beans work just as well as actual "pie weights" but they do NOT. They are not heavy enough. You line the crust with foil to prevent too much browning, and press in the pie weights in, then bake. After 25-30 minutes you remove the foil and weights and allow it to continue cooking to brown for 5 or so more minutes.

Here's the pie as it went into the oven. A tip for any meringue pie recipe is to make sure that the meringue touches the edges of the crust all the way around the entire pie. This will make it stick and prevent the meringue from pulling into the middle.

It's so hard not to dive in as soon as it comes out of the oven!
So much baking, unlike cooking, is nerve-wracking because you discover if you've succeeded or failed at the same time as your guests do. But whatever the outcome, at least you've tried, right?! And always try to follow Julia Child's advice to NEVER APOLOGIZE; NEVER EXPLAIN. Everything turned out precisely how you intended it. (Or at least that's what they'll think!)

Wednesday, August 5, 2009

Another Chicken Dinner

Note: I don't know what is going on with some of the fonts and font sizes in this post - I can't fix them!

A lovely dinner for 4 or fewer: Lemon Chicken with Croutons, Spinach in Puff Pastry, and Plum Cake Tatin. All three recipes are from Ina Garten's book Barefoot in Paris. I can pick up any of her books and make a million combinations for an awesome meal.

This is a very complete meal, with the bread in the chicken dish and the vegetable as either the first course or the side dish. You can add any extra vegetables or potatoes in with the chicken to roast; I added quartered button mushrooms. If I'd had carrots I definitely would have tossed them in too.
Next time I make this - and I most definitely will - I'll not put all the croutons on the platter under the chicken with all the juices like the recipe instructs. I'll put some around the chicken, whole or cut into pieces, on the platter, and try not to let them get completely soaked because they end up very quickly (big surprise:) just soggy. The best part of having croutons is the crunch! I might make a gravy out of the juices too, or reduce it a little, or add a squeeze of fresh lemon to the juices right before pouring them over the chicken next time. But without taking those extra steps it was still really great! Lemon zest over top on the plate was a perfect final touch for me because I love lots of lemon flavor with chicken.
A perfect bite! Chicken, mushroom, caramelized onion, crouton, with pepper and lemon zest:
Lemon Chicken with Croutons
Ina Garten, Barefoot in Paris
  • 1 (4 to 5-pound) roasting chicken
  • 1 large yellow onion, sliced
  • Good olive oil
  • Kosher salt
  • Freshly ground black pepper
  • 2 lemons, quartered
  • 2 tablespoons unsalted butter, melted
  • 6 cups (3/4-inch) bread cubes (1 baguette or round boule)
  • Preheat the oven to 425 degrees F.

Take the giblets out of the chicken and wash it inside and out. Remove any excess fat and leftover pinfeathers. Toss the onion with a little olive oil in a small roasting pan. Place the chicken on top and sprinkle the inside of the cavity with salt and pepper. Place the lemons inside the chicken. Pat the outside of the chicken dry with paper towels, brush it with the melted butter, and sprinkle with salt and pepper. Tie the legs together with kitchen string and tuck the wing tips under the body of the chicken.

Roast for 1 1/4 to 1 1/2 hours, or until the juices run clear when you cut between the leg and the thigh. Cover with foil and allow to sit at room temperature for 15 minutes. (The onions may burn, but the flavor is good.)

Meanwhile, heat a large saute pan with 2 tablespoons of olive oil until very hot. Lower the heat to medium-low and saute the bread cubes, tossing frequently, until nicely browned, 8 to 10 minutes. Add more olive oil, as needed, and sprinkle with 1/2 teaspoon salt and 1/4 teaspoon pepper. Place the croutons on a serving platter. Slice the chicken and place it, plus all the pan juices, over the croutons. Sprinkle with salt and serve warm.

I made a lot of tiny changes to this spinach in puff pastry recipe, so I'll note them within the recipe below.

Spinach in Puff Pastry
Ina Garten, Barefoot in Paris

  • 4 T. (half a stick) unsalted butter
  • 2 cups chopped onions (about 2 onions)
  • 1 T. chopped garlic (3 cloves)
  • 2 - 10 ounce - boxes frozen chopped spinach, defrosted
  • 1/3 cup chopped scallions (2 scallions)
  • 1 cup grated Gruyere cheese (I used small cubes of Swiss - flavor is perfect and it's cheaper!)
  • 3/4 cup Parmesan cheese
  • 4 extra-large eggs, beaten (I only had 2 large eggs to use, and it turned out just fine. More eggs would have made the filling firmer, but I didn't mind because I was serving this on a plate with a fork anyway.)
  • 1 T. dry bread crumbs, plain or seasoned
  • 2 t. kosher salt (do use this full amount - it seemed like a lot to me so I didn't, but then it needed to be salted later)
  • 3/4 t. pepper
  • 1/2 t. ground nutmeg (I left this out)
  • 1/4 cup toasted pignoli (pine) nuts (Left these out too)
  • 2 sheets (one box) frozen puff pastry, defrosted overnight in the refrigerator (Without fail I forget to do this or don't plan ahead. Leave the frozen puff pastry on the counter near a hot stove for a little while and it will be fine. Just make sure it doesn't get too warm or it will get sticky.)
  • 1 extra-large egg beaten with 1 T. water, for egg wash (so I ran out of eggs, right? So I used melted butter in place of egg wash, no problemo.)
Preheat the oven to 375 degrees. Heat the butter in a saute pan and cook the onions over med-low heat for 5 to 7 minutes, until tender. Add garlic and cook for one more minute. Meanwhile, squeeze most of the water out of the spinach and place it in a bowl. Add the onions and garlic, scallions, both cheeses, eggs, bread crumbs, salt, pepper, nutmeg, and pignolis. Mix well.

Unfold one sheet of puff pastry and place it on a baking sheet lined with parchment paper. Spread the spinach mixture in the middle of the pastry, leaving a one inch border. Brush the border with egg wash. Roll out the second piece of puff pastry on a floured board until it's an inch larger in each direction. Place the second sheet of pastry over the spinach and seal the edges, crimping them with a fork. Brush the top with egg wash but don't let it drip down the sides or the pastry won't rise. (At this point I used a sharp knife and trimmed all four sides.) Make three small slits in the pastry top, sprinkle with salt and pepper, and bake for 30-40 minutes, until the pastry is lightly browned. Transfer to a cutting board and serve hot.

And, dessert! Hot, sweet, fruity, cakey, delicious! There are some interesting steps to this dish, but it's fun to make and can be made mostly ahead of time and then baked while you're eating dinner. I thought it looked so cool too, like an upside down cake. The red color is from the plums alone, darkened from the caramel. Andrew, my 2 year old, called it "jelly cake" because it did look like red jelly.

The intimidating part of this recipe is the sugar syrup. You have to cook water and sugar in a saucepan over high heat until it turns "a warm amber color, about 360 degrees." I think that a digital thermometer is an ESSENTIAL piece of kitchen equipment, but if you don't have one, still do make this recipe!! Cook the syrup until it turns brown - take it a little farther than you're probably comfortable with, but keep a close eye on it the entire time it's on the heat because it will burn fast once it's beyond it's perfect stage. However the syrup looks, because you will be skeptical, just continue with the recipe and it will turn out just fine.

Plum Cake Tatin
Ina Garten, Barefoot in Paris

  • 6 tablespoons (3/4 stick) unsalted butter, at room temperature, plus extra for greasing the dish
  • 10 to 12 purple "prune" plums, cut in half and pitted (I just chose the purple ones over the orange/purple ones; they weren't labeled "prune." It took 5 and a half of them.)
  • 1 3/4 cups granulated sugar, divided
  • 2 extra-large eggs, at room temperature (I used large because that's what I had.)
  • 1/3 cup sour cream
  • 1/2 teaspoon grated lemon zest
  • 1/2 teaspoon pure vanilla extract
  • 1 cup plus 2 tablespoons all-purpose flour
  • 1/2 teaspoon baking powder
  • 1/4 teaspoon kosher salt
  • Confectioners' sugar (optional - I think unnecessary)

Preheat the oven to 350 degrees F. Generously butter a 9-inch glass pie dish and arrange the plums in the dish, cut side down.

Combine 1 cup of the granulated sugar and 1/3 cup water in a small saucepan and cook over high heat until it turns a warm amber color, about 360 degrees F on a candy thermometer. Swirl the pan but don't stir. Pour evenly over the plums.

Meanwhile, cream the 6 tablespoons of butter and the remaining 3/4 cup of granulated sugar in the bowl of an electric mixer fitted with the paddle attachment, until light and fluffy. Lower the speed and beat in the eggs one at a time. Add the sour cream, zest, and vanilla and mix until combined. Sift together the flour, baking powder, and salt and, with the mixer on low speed, add it to the butter mixture. Mix only until combined.

Pour the cake batter evenly over the plums and bake for 30 to 40 minutes, until a cake tester comes out clean. Cool for 15 minutes, then invert the cake onto a flat plate. If a plum sticks, ease it out and replace it in the design on top of the cake. Serve warm or at room temperature, dusted with confectioners' sugar.

Wednesday, April 15, 2009

Margee's Fudge

My grandma Margee is an excellent cook with several specialties - and every time I try to make one of her recipes, it is just not the same as when she makes it. Doesn't it usually turn out that way when you try to make someone else's signature dish?? Especially with older, handwritten recipes, when you just know there's more to it than what's written down.

Of course, if you go and change the recipe on purpose, yet expect it to have the same qualities as Grandma's, you're going to be in for a surprise! I always do that to myself... The results are always fine and good, but I've decided that no matter what, nothing is better than the real thing when what you want is the real thing. (The exact brands of ingredients may have something to do with it too... Remind me to ask Margee which chocolate she uses...)

That's why everyone looks forward to Christmastime when Margee makes tons of her homemade fudge and passes it around in tins collected over the years, with wax paper in between the layers of chocolate fudge with pecan halves or pieces on each irregular (but perfect) rectangle piece.

My reason this time for altering the recipe is that I didn't have too much chocolate in my cupboard (wha???? it was true), and I had some white chocolate that I never had a reason to use. So I made Chocolate-White Chocolate Swirl Fudge. I made this as a thank you token for some friends, and it got great reviews. But they've never tasted Margee's.

Margee's Original Chocolate Fudge
Margaret Waldrop

18 oz. semi-sweet chocolate
1 jar marshmallow fluff
2 cups chopped pecans (optional)
1 t. vanilla
4 1/2 cups sugar
1/2 cup butter
1/8 t. salt
13 oz. evaporated milk

Butter a 12x7" pan. In a saucepan, put sugar, butter, salt, and evaporated milk. Stir 20 minutes until softball stage (236 degrees). Remove from heat and add marshmallow fluff, nuts (if using), vanilla, and chocolate. Beat until thick, then pour into prepared pan to cool. Once cool, cut into pieces.

-In stead of stirring in the nuts, Margee places pecan halves on the fudge while it's cooling in the pan so they stick. I think she estimates one piece of pecan for each square and cuts the pieces of fudge accordingly once it's cool.

-Chocolate-White Chocolate Fudge variation: Use 9oz. semi-sweet chocolate and 9oz. white chocolate. After combining all ingredients except the chocolate, divide the mixture into two bowls and add the dark chocolate to one bowl and white to the other. Layer them in the pan and swirl with a knife.


Sunday, February 22, 2009

Pizza Party!!

How to have your own make-your-own-pizza party:

Step 1: Friends. Invite over some awesome friends, the more certifiable the better! Haha just kidding - normal people will be just fine, too.

Step 2: Ingredients. You definitely don't have to make everything from scratch, but why not?? It doesn't take much time and it's fun and satisfying. The menu was Caesar salad, pizzas with several toppings to choose from, and almond cake.

Step 3: Assembly. Do what you can ahead of time, and do what you must last minute. I prepped every single thing for this party that day, including shopping for the groceries. I first made the pizza dough, then the almond cake, the Caesar dressing, and then prepared the pizza toppings and cubed the leftover sourdough baguette for croutons. All of this can be done a day or more ahead of time.

Step 4: Party time! Fry up the croutons, toss the salad, let your friends serve themselves. Later roll out the pizza dough and set out all the toppings, and all you have to do is throw them in the oven.

I forgot to take a proper picture of the salad, so I snapped one half-way through my bowl. It was lemony, salty, creamy, cruncy, and delish! Caesar Dressing
Ina Garten

1 extra-large egg yolk at room temperature (or substitute 2 T. mayo)
2 teaspoons Dijon mustard
2 large cloves garlic, chopped
8 to 10 anchovy fillets (optional) - I used a big squirt of anchovy paste
1/2 cup freshly squeezed lemon juice (3 lemons)
2 teaspoons kosher salt - I used only 1 t. and that was plenty
1/2 teaspoon freshly ground black pepper
1 1/2 cups good mild olive oil
1/2 cup freshly grated Parmesan cheese


Place the egg yolks (or mayo), mustard, garlic, anchovies, lemon juice, salt, and pepper into the bowl of a food processor fitted with a steel blade. Process until smooth. With the food processor running, slowly pour the olive oil through the feed tube until thick. Add the grated Parmesan cheese and pulse 3 times.

If you don't have a food processor (or don't want to get it out and have to clean it after...), wisk together all the ingredients in a bowl. Store the dressing in a container that you can shake before adding it to the lettuce, and use it cool or at room temp.

Croutons
Bakery bread such as French or Italian bread, baguette, or sourdough
Extra-virgin olive oil
Kosher salt and pepper

Preheat broiler, or oven to 450. Cut the bread into medium-sized cubes. Toss them onto a baking sheet in an even layer and drizzle generously with olive oil, add salt and pepper, and toss to coat evenly. Broil or bake them just until nicely browned and crunchy.

Alternately, these can be made on the stove top in a large skillet. Heat the largest skillet you have on high. Add the olive oil, then the bread cubes, salt, and pepper. Stir around to coat, and cook them until browned and crunchy.


Yesterday I used a sourdough baguette and cooked them in a skillet on the stovetop.

OK, next comes pizza! Here are the before and after pics:Top left is Eric & Lisa's (aka the "Pile It On and Pile It On Good" pie). You wouldn't believe what's under that mountain of mozarella and blanket of pepperoni! They get an A+.

Top right is the masterpiece of the brothers Garcia, Marcelo and Hugo. It is supposedly Cindy Crawford with a mustach and a booger (did I mention this is more fun when your friends are certifiable??). They get a B because besides the fact that it's a creepy looking abstract face, it actually looks quite easily edible.

Bottom right is the work of Gretchen. Irratic sauce placing, sparce cheese, clemintine segments???? ("But people put pineapple on pizza!!" she says.) She gets a B-. Love ya, girl, but that's one sloppy looking pizza pie! LOL!! But she did say it tasted good.

Bottom right is mine and Erol's - his half is sausage and mushroom and mine is pepperoni and green peppers. It tasted great!

Here was the set-up: rolled out pizza dough on cornmeal, jarred tomato sauce (I was going to make my own, but decided to take this shortcut), shredded mozzarella (freshly grated in the food processor - I don't buy pre-shredded unless I really need the convenience), cooked Italian sausage, pepperoni, sliced mushrooms and green peppers. (Aparently the bowl of citrus was placed in too close proximity to the rest of the toppings; the mistake could have been made by any of us. I'll bump G's grade up to a B+.) Pizza Dough
Martha Stewart Baking Handbook

Makes 2 12-inch pizzas (I made the recipe twice for our pizza party)

1 cup warm water (about 110 degrees)
1/4 teaspoon sugar
1 envelope (1/4 ounce) active dry yeast
14 ounces (about 2 3/4 cups) flour, plus more for dusting work surface
1 t. table salt
1 1/2 T olive oil, plus more for bowl

In a small bowl, sprinkle sugar and yeast over warm water; stir with a fork until yeast and sugar dissolve. Let stand until foamy, about 5 minutes.

In a food processor, pulse the flour and salt to combine. Add yeast mixture and oil; pulse until mixture comes together but is still slightly tacky. Dough should pull away cleanly from your fingers after it's squeezed. Turn out dough onto a lightly floured work surface; knead 4 or 5 times, until a smooth ball forms.

Place the dough in a lightly oiled bowl, smooth side up. Cover with plastic wrap; let rise in a warm place until doubled in bulk, about 40 minutes.

Punch down dough. Fold dough back onto itself four or five times, then turn smooth side up. Replace plastic wrap; let dough rise again in a warm place until doubled in bulk, 30-40 minutes.

Punch down dough; turn out onto a floured work surface. Using a bench scraper or knive, divide the dough into two equal pieces. Knead each piece four of five times, then form a smooth ball.

--> At this point each ball of dough can be wrapped loosely in plastic wrap and refrigerated until you're ready to use them. Let them come back to room temp before the next step though.

Preheat the oven to 400. Sprinkle your work surface with cornmeal and use a rolling pin to roll the dough to form the crust. Transfer the dough onto a sheetpan and add your favorite toppings. (Or if you have a baking/pizza stone, let it preheat in the oven and add then top your pizza on a flat surface like the back of a sheetpan, something that allows you to easily slide the pizza, with toppings, onto the baking stone.) Bake until it's done according to how you like it, about 10 minutes or so. For a crisper crust without using a baking stone, when the pizza is almost finished cooking slide it off the pan and directly onto the oven rack for a few minutes.

For dessert we had almond cake, which was so easy to make and smelled soooooooo yummy. I'll definitely be making this cake again!

Almond Cake
from Cooking for Mr. Latte, which I discovered from the
Amateur Gourmet blog post that raved about this cake

2 sticks unsalted butter, softened
1 cup sour cream (8oz), at room temperature
1 tsp baking soda
2 cups all purpose flour
½ tsp salt
1 ½ cups sugar
7-ounce tube almond paste
4 egg yolks, at room temperature
1 tsp almond extract
Confectioner’s sugar, for dusting the cake

Preheat the oven to 350F. Generously butter the bottom and sides of a 9 inch springform pan.

Mix the sour cream with baking soda. In another bowl, sift the flour and salt together.

In the bowl of an electric mixer, cream the butter and sugar together until fluffy. Add the almond paste, a little at a time, at medium speed, and then beat for 8 minutes. Beat in the egg yolks, one at a time; mix until incorporated. It will look curdled; don't worry. Blend in the almond extract and sour cream mixture. Mixing at low, gradually add the flour mixture; beat just until blended.

Pour the batter into a prepared pan and spread evenly. Bake about 1 hour, until dark golden brown and it shrinks from the sides of the pan. Let cool in the pan on a wire rack. It will sink in the middle as it cools. Dust with confectioner’s sugar and serve.

You can store this cake for up to two weeks in the fridge. I recommend bringing it back to room temp before serving.

Wednesday, January 7, 2009

Frozen Peanut Butter, Chocolate, and Banana Loaf

One of my all time favorite sweet flavor combos is peanut butter, chocolate, and banana. (Definitely my fave milkshake and banana split flavor!) Add some heavy cream, and NOTHING else except some crunchy topping, and you have a pretty perfect dessert in my opinion!

Frozen Peanut Butter, Chocolate, and Banana Loaf
I think this is a Martha Stewart recipe, but I found it on another food blog.

12 ounces semisweet chocolate chopped into small pieces
3/4 cup creamy peanut butter
2 ripe bananas
1 cup heavy cream whipped to stiff peaks (about 2 cups)
1/2 cup roasted salted peanuts chopped (or crumbled Oreos; I used graham crackers because it was the best I had)
nonstick cooking spray and waxed paper for loaf pan

1. Coat an 8 1/2-by-4 1/2-inch loaf pan with cooking spray; line with waxed paper, leaving overhang on both long sides. Set aside.

2. Melt chocolate; cool to room temperature. Meanwhile, in a food processor, purée bananas until smooth.

3. Stir peanut butter into cooled chocolate until combined, then stir in banana purée. Gently fold in whipped cream until combined. Pour into prepared pan; top with peanuts. Fold waxed paper over top; wrap tightly in plastic. Freeze until firm, at least 3 hours.

4. To serve: Remove loaf from pan (run a hot towel across sides and bottom of pan, if necessary). Slice about 1/2 inch thick, as needed; rewrap remaining (unsliced) loaf, and freeze up to 1 month.

Wednesday, December 3, 2008

Cinnamon Swirl Bread

You KNOW you want to bite into this bread right now! I had to slice it while it was still warm; I couldn't take it any longer. Although I just read in my Cooks Illustrated cookbook that technically bread is not finished baking until it's cooled. Hmm. Sometimes a loaf's gotta take one for the team I guess.

The texture of the bread part is dense but not too heavy, and overall the loaf is breadlike rather than cinnamon-roll like; it's actually not very sweet. It would make a mean French toast and in fact if there's any left in a few days it just might! The cinnamon I use, Penzey's Extra Fancy Vietnamese Cinnamon, is particularly strong and spicy, like Big Red gum. Ceylon cinnamon would be very good in this recipe since it is more mellow, and of course the regular cinnamon from the grocery store has the most traditional flavor that everyone loves.

There are a few reasons why I decided to make this bread. First, I wanted to make a treat for our good friends the Decker/Dawson family (and all the cookies and pies in the house are just not good enough, it's gotta be FOR them). Second, I promised myself that I'd try my hand at more yeast doughs since I have the big jar of yeast. And lastly, because I was flipping through one of my favorite huge baking cookbooks and this was on the page I landed on.

Cinnamon Swirl Bread
recipe from Baking Illustrated; also found online here
.

Makes 1 loaf.

If you like, the dough can be made one day, refrigerated overnight, then shaped, proofed, and baked the next day. This recipe also doubles easily.

Ingredients
Enriched Bread Dough:
1/2 cup milk
4 tablespoons unsalted butter (1/2 stick), cut into 1/2 inch pieces
1 package dry active yeast (2 1/4 teaspoons)
1/2 cup warm water (110 degrees)
1/3 cup sugar
2 large eggs
1 1/2 teaspoons
table salt
3 1/4 - 3 3/4 cups
unbleached all-purpose flour

Filling:
1/4 cup sugar
5 teaspoons
ground cinnamon
Milk for brushing

Glaze:
1 large egg
2 teaspoons milk


Instructions
1. For the dough: Heat milk and butter in small saucepan over medium heat until butter melts. Cool to lukewarm (about 110 degrees).

2. Meanwhile, sprinkle yeast over warm water in bowl of stand mixer fitted with paddle. Beat in sugar and eggs and mix at low speed to blend. Add salt, lukewarm milk mixture, 2 cups of flour; mix at medium speed until thoroughly blended, about 1 minute. Switch to dough hook attachment. Add 1 1/4 cups flour, and knead at medium-low speed, adding additional flour sparingly if dough sticks to sides of bowl, until dough is smooth and comes away from sides of bowl, about 10 minutes.

3. Turn dough onto work surface. Squeeze dough with a clean dry hand. If dough is sticky, knead in up to 1/2 additional cup flour to form a smooth, soft, elastic dough. Transfer dough to a very lightly oiled large plastic container or bowl. Cover top of container with plastic wrap and let rise until double in size, 2 to 2 1/2 hours. (Ideal rising temperature is 75 degrees.) After rise, punch down center of dough once (can be refrigerated, covered, up to 18 hours). Making sure not to fold or misshape dough, turn it onto unfloured work surface; let dough rest, to relax, about 10 minutes.

4. Grease sides and bottom of a 9-by-5-inch loaf pan. Mix sugar and cinnamon in small bowl.

5. Press dough neatly into an evenly shaped 6-by-8-inch rectangle. With short side of dough facing you, roll dough with rolling pin into evenly shaped 8-by-18-inch rectangle (flour counter lightly if dough sticks). After rolling out dough, brush liberally with milk. Sprinkle filling evenly over dough, leaving 1/2-inch border on far end. Roll up dough, pinching gently with fingertips. To keep loaf from stretching beyond 9 inches, use hands to occasionally push ends in as dough is rolled. Use fingertips to pinch the dough ends together very tightly to form a secure seam. With seam side facing up, push in center of ends. Firmly pinch outside dough edges together to seal.

6. Place loaf, seam side down, into prepared pan; press lightly to flatten. Cover top of pan loosely with plastic wrap and set aside to proof. Let rise until dough is 1 inch above top of pan, about 1 1/2 hours, or about 1 hour longer if dough has been refrigerated. As dough nears top of pan, adjust oven rack to center position and heat oven to 350 degrees.

7. Meanwhile, in small bowl, whisk together egg and milk. Gently brush loaf top with egg mixture; bake until loaf is golden brown and instant-read thermometer pushed through top side into center of loaf registers 185 to 190 degrees, 30 to 35 minutes. Remove bread from pan and cool on its side on wire rack until room temperature, at least 45 minutes. (Can be double-wrapped in plastic wrap and stored at room temperature for four days or frozen up to three months.)

For mixing by hand: Beginning with step 2, sprinkle yeast over water in large bowl. Follow instructions in step 2, using hand mixer or wooden spoon, thoroughly blending ingredients with 2 cups flour. Using wooden spoon, mix in 1 1/4 cups flour. Knead by hand until dough is smooth and elastic, 12 to15 minutes, adding additional flour if necessary. Transfer dough to lightly oiled container and follow rising instructions.

I doubled the recipe, and here's all the dough in step #3 after being punched down:Here's step #5:These are the loaves just before going in the oven. I have one silicon loaf pan and one non-stick one. I prefer.... neither. But as you'll see, the non-stick made a perfect loaf (for the first time in it's life! It usually burns things), and the silicon one doesn't hold it's own shape very well so the bread swells and billows out, which isn't preferable in this recipe because we're trying to keep the cinnamon-sugar filling rolled up and the edges pinched and sealed together. I was a proud baker when I pulled this out of the oven! I've never made anything that looked like that before:Here are the loaves cooling on their sides. They started out with the exact same weight of dough, and you can see how the silicon pan allowed the dough to spread out.

Tuesday, October 28, 2008

Potato Chip Cookies

I saw recipes for Potato Chip Cookies in two different places on the same day, so I took it as a sign that I must make them. I don't have a rule or anything, but hey, it sounded good to me!

Now, I had NO idea what to expect here. I've never heard of these before, and certainly never eaten them. You'd think they'd be salty, right?? But no, they're not! I don't know why and it's really strange. They don't taste like potato chips at all, and you'd never know they're in there, except for they feel kinda potato-chippy when you chew them. The flavor is very buttery and a little nutty from the pecans. They are crisp, and extremely light and crumbly, like a pecan sandy but lighter in texture. Erol said that they are similar to chips in that you could eat a dozen of these before you realize it.
Potato Chip Cookies
recipe from The Best Of Fine Cooking Cookies magazine

8 oz. (1 cup) unsalted butter, softened at room temperature; more for shaping
1/2 cup granulated sugar; more for shaping
1 tsp. pure vanilla extract
8 oz. (scant 2 cups) all-purpose flour
2 oz. (1/2 cup) finely chopped pecans
1/2 cup finely crushed potato chips

Position oven racks in the middle and top of the oven and heat the oven to 350°F. Line two large baking sheets with parchment.
With a stand mixer (use the paddle attachment) or a hand mixer, beat the butter and sugar on medium speed in a large bowl until creamy and well blended, about 4 minutes, scraping the bowl as needed. Add the vanilla and beat again until blended. Add the flour, pecans, and potato chips and mix on low speed until just blended.
Shape heaping teaspoons of dough into 1-inch balls. Arrange the balls about 2 inches apart on the prepared baking sheets. Put some sugar in a shallow bowl. Lightly grease the bottom of a glass or measuring cup with soft butter. Dip the glass into the sugar and press the glass down on a dough ball until it’s about 1/4 inch thick. Repeat dipping and pressing with the remaining balls.
Bake until the cookies look dry on top and the edges are light golden, 10 to 12 minutes, rotating and swapping the positions of the sheets for even baking. Let the cookies cool on the sheets on racks for 5 minutes before transferring them to racks to cool completely.
Store at room temperature or freeze in an airtight container, separating the cookie layers with waxed paper.

Rosemary Butter Cookies

If my condo was burning down, I would grab the magazine this recipe is in. Once I thought I lost it, and I almost lost IT! I would have written to the Martha Stewart company begging for a replacement.

Anyway, I make these cookies every year for Thanksgiving. My mom and sister would have me disinvited if I didn't bring them! Rosemary is an unusual ingredient for cookies, I know, but if you like the scent of rosemary you will LOVE these cookies. They are incredibly good. And with the sugar on the the outside, they remind me of those tins of butter cookies, just homemade, and with a twist. I saw my baggie of rosemary from my parents' yard in the fridge and couldn't think of anything else to make but these.

When you roll the logs of dough, make them quite skinny so you will have cute small cookies. I use Turbinado sugar (or Sugar in the Raw) instead of sanding sugar since it's much cheaper and very good. Rosemary Butter Cookies
recipe from Martha Stewart Holiday Cookies magazine, 2006

Makes about 5 dozen

1 cup (2 sticks) unsalted butter, softened
3/4 cup granulated sugar
1 large egg plus 1 egg white, beaten
1 teaspoon pure vanilla extract
2 1/2 cups sifted all-purpose flour
1 tablespoon finely chopped fresh rosemary
3/4 teaspoon coarse salt
1/2 cup fine sanding sugar


Put butter and granulated sugar in the bowl of an electric mixer fitted with the paddle attachment; mix on medium speed until pale and fluffy, about 2 minutes. Mix in whole egg and vanilla. Reduce speed to low. Add flour, rosemary, and salt, and mix until combined.
Halve dough; shape each half into a log. Place each log on a 12-by-16-inch sheet of parchment. Roll in parchment to 1 1/2 inches in diameter, pressing a ruler along edge of parchment at each turn to narrow log. Transfer to paper-towel tubes to hold shape, and freeze until firm, about 1 hour.

Preheat oven to 375. Brush each log with egg white; roll in sanding sugar. Cut into 1/4-inch-thick rounds. Space 1 inch apart on baking sheets lined with parchment. Bake until edges are golden, 18 to 20 minutes. Let cool on sheets on wire racks. Store in airtight containers at room temperature up to 3 days.

Chocolate Chunk Cookies

It has been cookie mania over here in my messy kitchen! I've made Potato Chip Cookies, Rosemary Butter Cookies, and these Chocolate Chunk ones. Of course, each one comes with it's own story, so here they are, one at a time.

We call these Mac Cookies because my grandmother, who we called Mac, made these by the thousand every time she visited us from Florida. They are by far the best thing she ever did for us kids, but hey, we'll take what we can get! The recipe is originally from the packaging of Baker's Semi-Sweet Chocolate, though they have changed the recipe since. I didn't add walnuts today, but I usually do (black walnuts when I can get my hands on them), or sometimes pecans. I get my chocolate from Trader Joes, and I use bittersweet, which is less sweet than semi-sweet. You can use either light or dark brown sugar, but I prefer dark. Especially if you add nuts, the batter seems extremely chunky, like there's not enough batter for the chunks of chocolate and nuts, but don't be alarmed! You can make small, bite sized cookies or huge ones and they will all be perfect, just adjust the cooking time a minute or so more or less.Chocolate Chunk Cookies
1-3/4 cups flour
3/4 tsp. baking soda
1/4 tsp. salt
3/4 cup (1-1/2 sticks) butter or margarine, softened
1/2 cup granulated sugar
1/2 cup firmly packed brown sugar
1 egg
1 tsp. vanilla
1 pkg. (12 oz.) BAKER'S Semi-Sweet Chocolate Chunks
1 cup chopped toasted walnuts

HEAT oven to 375°F.

MIX flour, baking soda and salt in medium bowl; set aside.

BEAT butter and sugars in large bowl with electric mixer on medium speed until light and fluffy. Add egg and vanilla; beat well. Gradually beat in flour mixture. Stir in chocolate chunks and walnuts. Drop by heaping tablespoonfuls on to ungreased cookie sheets.

BAKE 12 to 13 minutes or just until golden brown. Cool on cookie sheets 1 minutes. Remove to wire racks and cool completely.

Saturday, October 18, 2008

Pumpkin Cheesecake!

Yes this post deserves an exclamation point! It is yummmmmmmmmmmm delish!
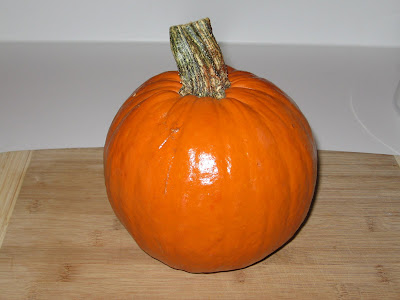
Special thanks to Lestra for giving me this awesome baking pumpkin, and to Pepsi for giving me the idea for pumpkin cheesecake! I googled the recipe from California Pizza Kitchen, where Pepsi says she and her husband look forward to their pumpkin cheesecake every fall and hope they haven't run out by the time they get there!

Who knows how authentic this recipe is to CPK since it's from some random website, but either way it gets two thumbs up from me. I'll post the recipe as is first, then share my notes and pictures:

California Pizza Kitchen Pumpkin Cheesecake
recipe from
fooddownunder.com

GRAHAM CRACKER CRUST
1 1/2 cup graham cracker crumbs (about 22 sheets, finely crushed with a rolling pin)
3 tbl sugar
6 tbl unsalted butter melted

CHEESECAKE FILLING
3 pkt cream cheese - (8 oz ea)
1 1/2 cup dark brown sugar - (firmly packed)
1 tbl all-purpose flour plus
2 tsp all-purpose flour
1 1/2 tsp ground cinnamon
1/8 tsp ground cardamom
1/8 tsp ground cloves
1/8 tsp ground ginger
1/8 tsp grated nutmeg
1 cup sour cream plus
2 tbl sour cream
3 lrg eggs
2 tsp vanilla extract
1 1/4 cup canned pumpkin puree

To Make the Graham Cracker Crust: Put the graham cracker crumbs in a food processor fitted with the steel blade and process until they have a uniformly fine texture. Add the sugar and pulse to combine. With the machine running, pour the melted butter through the feed tube and continue processing just until the mixture forms a soft mass. Remove from the processor and firmly press the mixture into the base of a 9-inch springform pan, spreading it evenly.

To Make the Cheesecake: Preheat the oven to 350 degrees.

In the bowl of an electric mixer fitted with the flat beater attachment, beat the cream cheese until soft, stopping the mixer occasionally to scrape down the sides and bottom of the bowl with a rubber spatula. Add the brown sugar and continue beating until thoroughly incorporated and creamy.

In a separate small bowl, stir together the flour, cinnamon, cardamom, cloves, ginger, and nutmeg. Add the flour mixture to the cream cheese mixture and beat until thoroughly combined, stopping occasionally to scrape down the bowl. In the same way, beat in the sour cream and then, one at a time, the eggs, scraping down the bowl after each addition. Add the vanilla and pumpkin and beat until thoroughly combined.

Pour the filling into the prepared springform pan and place on the center rack of the oven. Bake for 1 hour. Protecting your hands with oven mitts or pads, test for doneness by gently moving the pan to see if the center of the cheesecake has firmed up - a sign of doneness - or is still slightly fluid (alternatively, check the cheesecake's internal temperature with an instant-read thermometer, which should register 180 degrees). The cheesecake may require up to 20 minutes more baking time.

When it is done, let it cool to room temperature and then refrigerate it overnight before removing the side of the pan. Cut the cheesecake into wedges with a sharp knife.


OK first, cardamom. CARDAMOM! This spice, of which only 1/8 teaspoon is called for in this recipe, is $15 per jar! Even $13 on sale at Safeway was RIDICULOUS. I should have noted in my apple butter post that I did not include the cardamom, so I apologize but I'm pretty certain that you'd leave it out too. Cardamom is related to the ginger family, but with all the spices going on (in both recipes) I did not add more of ginger or anything else, I simply omitted it and recommend you do the same if you want to save a little money. Or instead use the $14 (sale price) for four pounds of unsalted butter like I did! Goodness groceries are expensive!

But while we're on the subject of spices, I can't talk about spices and not talk about Penzeys. Penzeys is a spice retailer that I absolutely love. My momma learned about them and started ordering boxes and boxes of spices for me, my sister, and herself every Christmas. They are very high quality and much cheaper than grocery store prices for McCormick or store brand spices. And the selection is infinite for all types of whole and ground spices and spice blends. For example check out the cardamom page! See, I could spend $4 and get four tablespoons (1/4 cup jar) of cardamom seeds or ground. They opened a store in Carytown, near my folks house, and they also have one in Falls Church. You can smell each and every single spice they carry at their stores and it's magnificent. I could die in that place. I love it so much. But really though, your nose does wear out after a dozen or so, so sniff selectively.

The recipe of course calls for pumpkin puree, canned, but since I had that lovely pumpkin... well, it met an early demise... (isn't this cooler than a jack-o-lantern!!)

Please, don't feel sorry for the pumpkin, it was happy to live out it's full potential as a cheesecake. Feel sorry for my poor knife because a hammer was involved with getting the sucker split open.
Martha says to roast a pumpkin, cut it in half and remove the seeds, then place cut side down on a baking sheet in a 400 degree oven for at least 1 hour. Mine roasted as such for about 15 minutes, then I had to leave the house, so I turned off the oven without opening the door, and let them sit in there while I was gone for 2 hours.
They were perfectly soft and steaming hot under very hard shells when I got home!
I took the pumpkin flesh and whirred it up in the food processor once it was cool, and I had a little less than 2 cups of fresh pumpkin puree. It tasted really good just plain!

Here's the graham cracker crust I was pressing into the pan with a cup. I thought the crust came out too thick, so next time I'll use less graham crackers, but it tasted good and held the shape of the cheesecake nicely.
Here's the pumpin puree getting plopped into the batter.
Yes, you know I sieved the batter! Do not skip this step even if it looks fine to the naked eye! You guarantee to eliminate any egg boogers and clumps of cream cheese, and your batter will be absolutely perfect and smooth. Don't forget to use separate spatulas pre- and post-sieving!
Here's the cheesecake straight out of the oven, puffed and cracked in all it's glory.
And here it is at serving time, sunken in and chilled out.
Well, I had to test it before I could get the camera, and you can't blame me for that! It is excellent - not overly spiced, not too pumpkin-y, and not to little either.
Pepsi I hope you and Kyle are home because I'm about to text you and see if you want me to drop some off at your house! No matter how much you like cheesecake you can only eat so much, so there's plenty to share! Anyone else in the area want some in fact? Let me know!

Wednesday, October 15, 2008

PB&J Bars

This is another recipe from our cabin weekend. I caught people eating this at all hours of the day and night! It's very rich and heavy, so a serving is just a small square and a glass of cold milk is a MUST!

The only tip I have for this one is don't spread the jelly all the way out to the edges of the pan. When it touches the edge, it gets too sticky and candy-like, and I like the end and corner pieces nice and crumbly.

I don't have a picture of mine, but this is from the recipe book. Better than nuthin??
Peanut Butter & Jelly Bars
recipe from Ina Garten's cookbook Barefoot Contessa at Home

1/2 pound (2 sticks) unsalted butter, at room temperature
1 1/2 cups sugar
1 teaspoon pure vanilla extract
2 extra-large eggs, at room temperature
2 cups (18 ounces) creamy peanut butter (recommended: Skippy)
3 cups all-purpose flour
1 teaspoon baking powder
1 1/2 teaspoons kosher salt
1 1/2 cups (18 ounces) raspberry jam or other jam (I used seedless strawberry preserves)
2/3 cups salted peanuts, coarsely chopped

Preheat the oven to 350 degrees F.

Grease a 9 by 13 by 2-inch cake pan. Line it with parchment paper, then grease and flour the pan.

In the bowl of an electric mixer fitted with the paddle attachment, cream the butter and sugar on medium speed until light yellow, about 2 minutes. With the mixer on low speed, add the vanilla, eggs, and peanut butter and mix until all ingredients are combined.

In a small bowl, sift together the flour, baking powder, and salt. With the mixer on low speed, slowly add the flour mixture to the peanut butter mixture. Mix just until combined.

Spread 2/3 of the dough into the prepared cake pan and spread over the bottom with a knife or offset spatula. Spread the jam evenly over the dough. Drop small globs of the remaining dough evenly over the jam. Don't worry if all the jam isn't covered; it will spread in the oven. Sprinkle with chopped peanuts and bake for 45 minutes, until golden brown. Cool and cut into squares.

Monday, October 6, 2008

Chocolate Cream Pie

One day at home I decided I'd like to make a simple chocolate pie, so I searched the net for a recipe that used ingredients I already had. I got frustrated quickly, even though I have a pantry stocked for baking. But this recipe I can make anytime, with the exception of the Oreo Crust because we don't usually have those on hand. A regular pie crust is perfectly fine; the Oreo Crust just puts it over the top. Everyone's pantry is different, but I think it's more likely that someone will have a can of sweetened condensed milk on hand than a quart of heavy cream. Since I made this pie a couple of different ways, I can offer some optional ingredients because I know it will work either way, and I want to keep it simple and try to avoid trips to the store.

I used my sieve, or mesh strainer, twice in this recipe: once for the egg yolks before they were added to anything, and then again for the entire mixture before it goes into the crust. I ALWAYS sieve eggs before adding them to any cream or custard pie, like pumpkin, coconut, etc. I absolutely hate those little globby bits in the egg and find it necessary without a doubt to remove them. Have you ever noticed one in a forkfull of pumpkin pie? They don't just melt away! Yuck! Secondly, when making a custard on the stovetop, you always run the chance of curdling the eggs, resulting in little globs of cooked egg inside the mixture. Sieving after cooking ensures a super smooth and creamy pie every time. Call me anal, but I promise I'll never make you eat the glob!


Chocolate Cream Pie with Oreo Crust
recipe adapted from recipezaar.com

1 2/3 cups water
3 tablespoons cornstarch
5 tablespoons Dutch process cocoa (I only tested with Dutch, but will work with regular cocoa powder)

2 ounces bittersweet chocolate, chopped (optional, but this adds richness)
1 (14 ounce) sweetened condensed milk
3 egg yolks
2 tablespoons butter
1 teaspoon vanilla

1/2 teaspoon instant espresso powder (optional, and won't make the pie taste like coffee, only gives it a richer flavor overall)
1 (9 inch) Oreo pie crust

Put the 3 egg yolks in a sieve and press through into a small bowl. In a medium saucepan, whisk the cornstarch and cocoa with the water until smooth. Sir in sweetened condensed milk, egg yolks, and chopped bittersweet chocolate, and cook on medium until chocolate is completely melted and the mixture becomes quite thick, stirring constantly. Stir in 2 tablespoons butter, vanilla, and instant espresso powder. Press through a clean sieve into the baked and cooled pie shell, and chill in the refrigerator for 3 hours. Serve with whipped cream.


Oreo Pie Crust
recipe adapted from epicurious.com

21 Oreos (about a row and a half)
1/2 stick unsalted butter, cut into pieces, room temperature

Preheat oven to 350°F. Butter 9-inch-diameter pie dish. Finely grind cookies in a food processor. Add butter and process until mixture is evenly moistened. Press crumb mixture onto bottom and up sides of prepared pan to form thin crust. Bake crust 5 minutes. Transfer crust to rack and cool completely. Can be made ahead of time and refrigerated.

Thursday, September 25, 2008

Peppermint-Chocolate Cake

You know how you find a picture of a recipe and then you make it, and it looks NOTHING like the picture? Kinda like how Big Mac's look so appetizing on the trucks and billboards but you get one and it's, well, disappointing?

This did not happen to us with this cake! We were all very impressed. My mom made it and Jessi added the dark chocolate to the top. It was chocolatey and minty and what can you say about cream cheese icing other than YUM!
Peppermint-Chocolate Cake
Cooking Pleasures magazine, Dec 2006/Jan 2007

Cake:
3/4 cup unsalted butter
5 oz. semisweet chocolate, chopped
1 1/2 cups sugar
3 eggs
1 1/2 t. peppermint extract
1 t. vanilla extract
2 1/4 cups cake flour
1 t. baking soda
3/4 t. baking powder
3/4 t. salt
1 1/2 cups sour cream

Icing:
1/2 cup unsalted butter, softened
8 oz. cream cheese, softened


Glaze:
1 oz. semisweet chocolate, chopped
1 tablespoon unsalted butter
1/2 teaspoon vanilla extract


For the cake: Heat oven to 325F. Grease bottom of 9-inch springform pan. Line bottom with parchment paper; grease and flour paper.

Microwave 3/4 cup butter and 5 oz. chocolate in medium microwave-safe bowl on medium 3 to 4 minutes or until melted; stir until smooth. Pour into large bowl; cool 10 to 15 minutes.

Beat sugar into chocolate mixture at low speed. Beat in eggs, peppermint extract and 1 teaspoon vanilla. Whisk flour, baking soda, baking powder and salt in medium bowl. Alternately beat sour cream and flour mixture into chocolate mixture, beginning with sour cream. Pour into pan.

Bake 1 1/4 to 1 1/2 hours or until toothpick inserted in center comes out clean. Cool completely on wire rack.

For the icing: beat 1/2 cup butter and cream cheese in large bowl at medium speed 1 to 2 minutes or until smooth and creamy. Slowly beat in powdered sugar at low speed until well blended.

Remove sides from springform pan; invert cake onto cardboard round or platter. Remove parchment paper. Frost cake with icing.

For the glaze: Microwave 1 oz. chocolate and 1 tablespoon butter in small microwave-safe bowl on medium 1 minute or until melted; whisk until smooth. Whisk in 1/2 teaspoon vanilla; cool until slightly thickened. With small fork or whisk, drizzle glaze over cake. Cover and store in refrigerator.